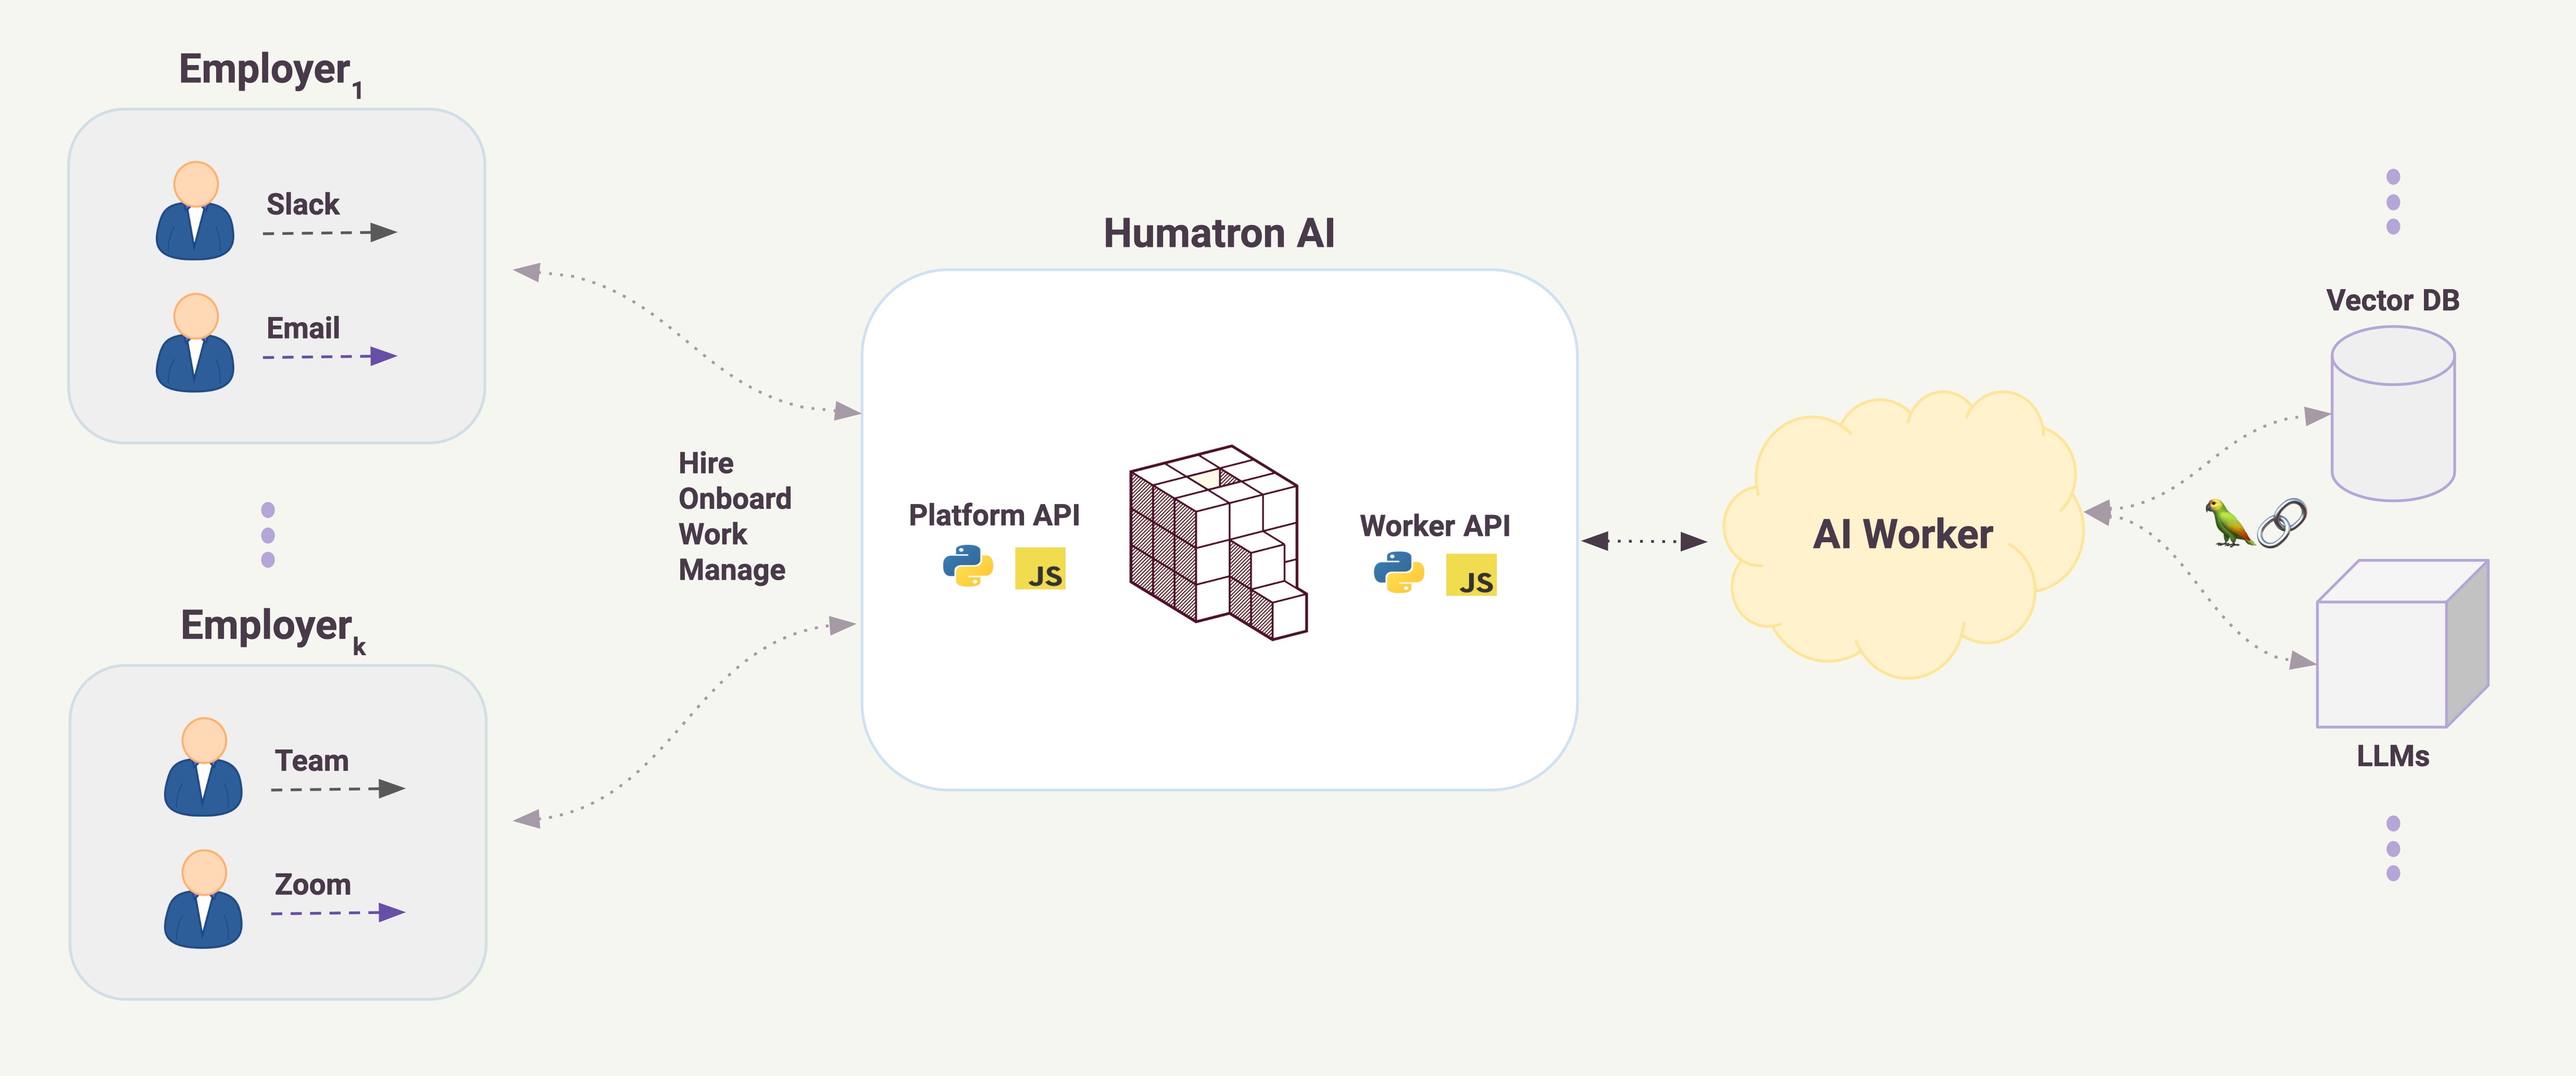
Lets review the minimal implementation of the AI worker. We will use
Python SDK in this example.
In our implementation we will forward all the messages that we receive from the outside world (
message request in
Worker API) to OpenAI LLM and will send back the LLM response back to the same channel the request was received (i.e. Slack, Email, REST or SMS). We will also use Langchain library for constructing LLM pipeline and will use
Python SDK's utilities that simplify working with REST requests. Here's the Python code that deals directly with Humatron integration:
1# AI worker Example.
2from uuid import uuid4
3from humatron.worker.client import *
4from humatron.worker.utils import make_default_response_payload
5from langchain_core.output_parsers import StrOutputParser
6from langchain_core.prompts import ChatPromptTemplate
7from langchain_openai import ChatOpenAI
8
9# Define the chat prompt template.
10_prompt = ChatPromptTemplate.from_messages([('system', 'You are a helpful assistant.'), ('user', '{input}')])
11
12# Worker implementation based on `python-sdk` library.
13class HumatronWorkerChatGpt(HumatronAsyncWorker):
14    def __init__(self, openai_api_key: str):
15        super().__init__()
16        # Create the processing chain.
17        self._chain = _prompt | ChatOpenAI(openai_api_key=openai_api_key) | StrOutputParser()
18
19    # Implement the `process_payload_part` method.
20    def process_payload_part(self, rpp: RequestPayloadPart, _: Storage) -> ResponsePayloadPart:
21        # Process different types of request commands.
22        match rpp.body:
23            case RequestDataMessage(_) as data:
24                # To simplify the example, we skip the check for sending a message to oneself, etc.
25                match data.message:
26                    case RequestMessageEmail(_) as email:
27                        resp = self._chain.invoke({'input': email.text})
28                        resp_email = ResponseMessageEmail.make(sender=email.to, to=email.sender, subj='Demo', text=resp)
29                        return ResponseDataMessage.make(data.instance.id, data.resource_id, resp_email, data.payload_id)
30                    case RequestMessageSms(_) as sms:
31                        resp = self._chain.invoke({'input': sms.text})
32                        resp_sms = ResponseMessageSms.make(sender=sms.receiver, receiver=sms.sender, text=resp)
33                        return ResponseDataMessage.make(data.instance.id, data.resource_id, resp_sms, data.payload_id)
34                    case RequestMessageSlack(_) as slack:
35                        resp = self._chain.invoke({'input': slack.body['text']})
36                        resp_slack = ResponseMessageSlack.make(channel=slack.body['channel'], text=resp)
37                        return ResponseDataMessage.make(data.instance.id, data.resource_id, resp_slack, data.payload_id)
38                    case _:
39                        raise ValueError(f'Unexpected request: {data.message}')
40            case _:
41                # We skip all `interview`, `register`, `unregister`, `pause` and `resume` logic.
42                return make_default_response_payload(req_cmd=rpp.req_cmd, req_payload_part=rpp.body)
Comments below:
- Lines
3, 4 - import classes from the Python SDK library. This library provides asynchronous request handling as well as a number of utility methods. - Line
17 - initialize OpenAI LLM and create the request processing chain. - Lines
13 - define the HumatronWorkerChatGpt class, which inherits from HumatronAsyncWorker, part of the Python SDK library. - Line
20 - implement the abstract process_payload_part method from the HumatronAsyncWorker ABC class. - Lines
27, 31, 35 - send requests to the LLM, with the text field value extracted from the request body. - Line
26 - handle the message request with channel_type equal to email. We return an email response to the question contained in the email, sent to the sender's address. - Line
30 - handle the message request with channel_type equal to SMS. We return an SMS response to the question contained in the message, sent to the sender's phone number. - Line
34 - handle the message request with channel_type equal to slack. We return a Slack message response to the question contained in the Slack request, sent to the channel from which the request was received.
NOTE: this example does not check for possible system states nor validates request input data.
The remaining task is to wrap this AI worker implementation as a web service. In this example, we will use Python
Flask web server and utility integration provided by
Python SDK:
1# Web Server Integration Example.
2import os
3from dotenv import load_dotenv
4from humatron.worker.rest.flask.flask_server import start_flask_server
5from demo import HumatronWorkerChatGpt
6
7# Start the REST server.
8def start() -> None:
9    # Load the environment variables.
10    load_dotenv()
11
12    # Get the tokens from the environment.
13    req_token, resp_token = os.environ['HUMATRON_REQUEST_TOKEN'], os.environ['HUMATRON_RESPONSE_TOKEN']
14    openai_api_key = os.environ['OPENAI_API_KEY']
15    host, port, url = os.environ['REST_HOST'], int(os.environ['REST_PORT']), os.environ['REST_URL_WORKER']
16
17    worker = HumatronWorkerChatGpt(openai_api_key=openai_api_key)
18    start_flask_server(worker, req_token, resp_token, host, port, url, None, None, lambda: worker.close())
19
20if __name__ == '__main__':
21    start()
Comments below:
- Line
4 - import classes from the Python SDK library. - Lines
5, 18 - import and create a new instance of HumatronWorkerChatGpt we developed above.
Once you have your web service running, all you have to do is to submit and publish your build on humatron platform. During submission you’ll have a number of options to set like support for interview, compensation, support for agentic workflow, etc.
When initially submitted the build is in private mode so that only members of your team can have access to it, i.e. interview and hire. It allows you to do the final testing and improvements. Once ready you can make your build public and accessible for everyone on Humatron platform - or keep it private accessible only to your company, the choice is yours.
That’s all! 🎉
